![]()
We’ve discussed large format on several occasions on CCR in the past, however, we’ve never done a basics episode for those wanting to get into large format. Well never fear, that is exactly what Alex and James are going to discuss today, so grab your notebook and ready to go big!
Camera Types
You can put all large format cameras into a single category of ‘large format’ or simply ‘view camera’ because you are mostly using a piece of ground glass to look directly through the lens so it’s almost what you see is what you get. However, there are differences between these view cameras and they can be sorted roughly into four categories.
Monorail
The simplest and least expensive camera to start off doing large format photography is a monorail camera. The name comes from a single rail that connects the front and rear standards which has the bellows between these two standards. The front standard holds the lens and the rear your ground glass. The rail does get a lot of movements, however, these cameras are fairly bulky and while they can be taken out into the field they do require a bit more time to set up. The Cambo is a great place to start and often can be had for the price of the lens, however, if you’re in the market for top dog Sinar has some of the best monorails out there starting with the Norma and the F-series and of course the mighty P.
Field Camera
As the names suggest, the field camera is designed to be taken out into the field, these often fold flat and are fairly compact in the bag. You do lose some of the movements that you get with a monorail, and they often cost a bit more money. That said, they’re worth the investment if you do a lot of travel.

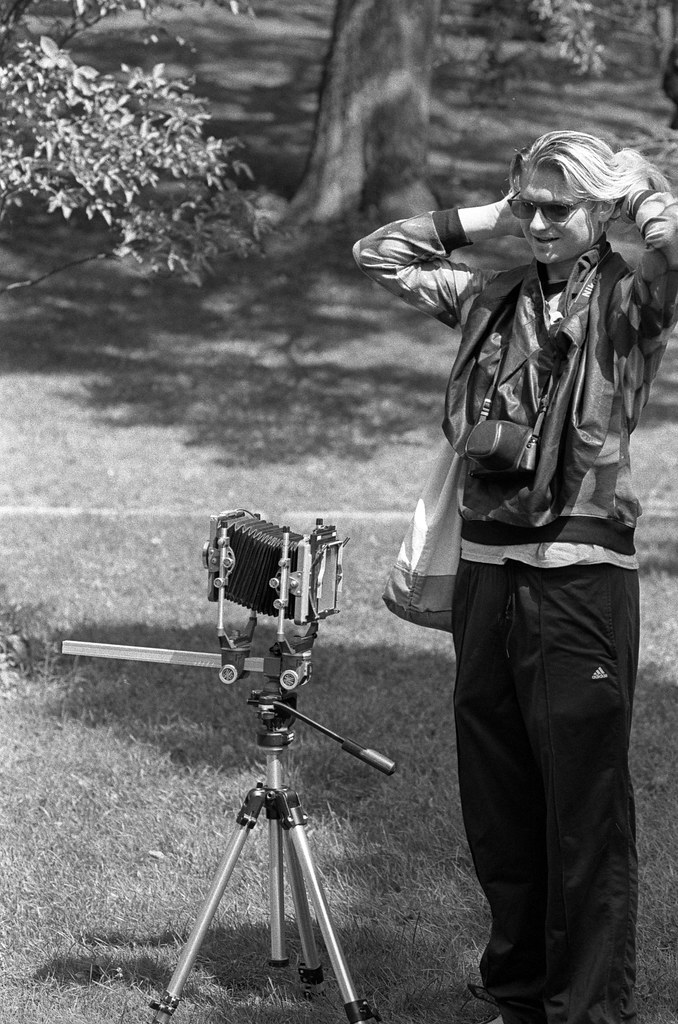
Press Camera
Press cameras are the ones that you see in all those old movies and pictures of the piles of photographers waiting to get the shot for the local newspaper or the police. The iconic Graflex line of cameras are typical of the style but there’s also Burke & James and others. These cameras are all fairly old at this point but are a great place to start. These cameras are often equipped with a rangefinder to allow for handheld operation.

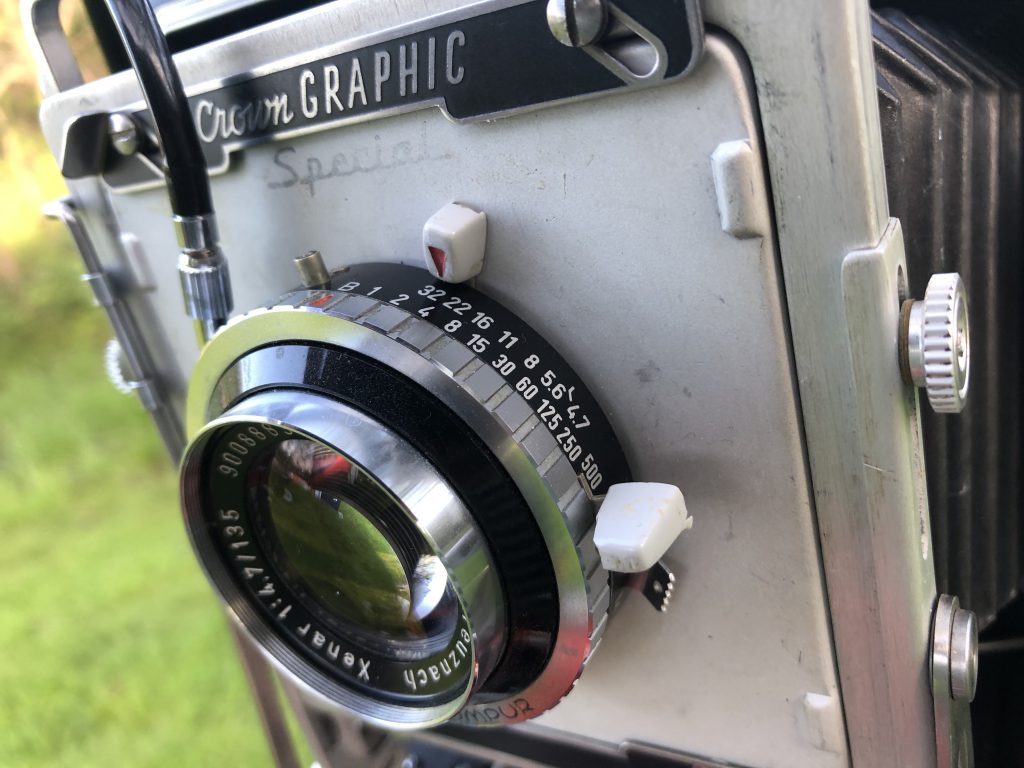
Technical Camera
A branch of press cameras, technical cameras are ones designed for precision work with geared movements to allow for exacting movements. MPP and Linhoff are two manufacturers of these cameras with Linhoff being well-known especially with their Technika line of cameras. Although with these additions the cameras do carry a hefty price tag but well worth the cash.

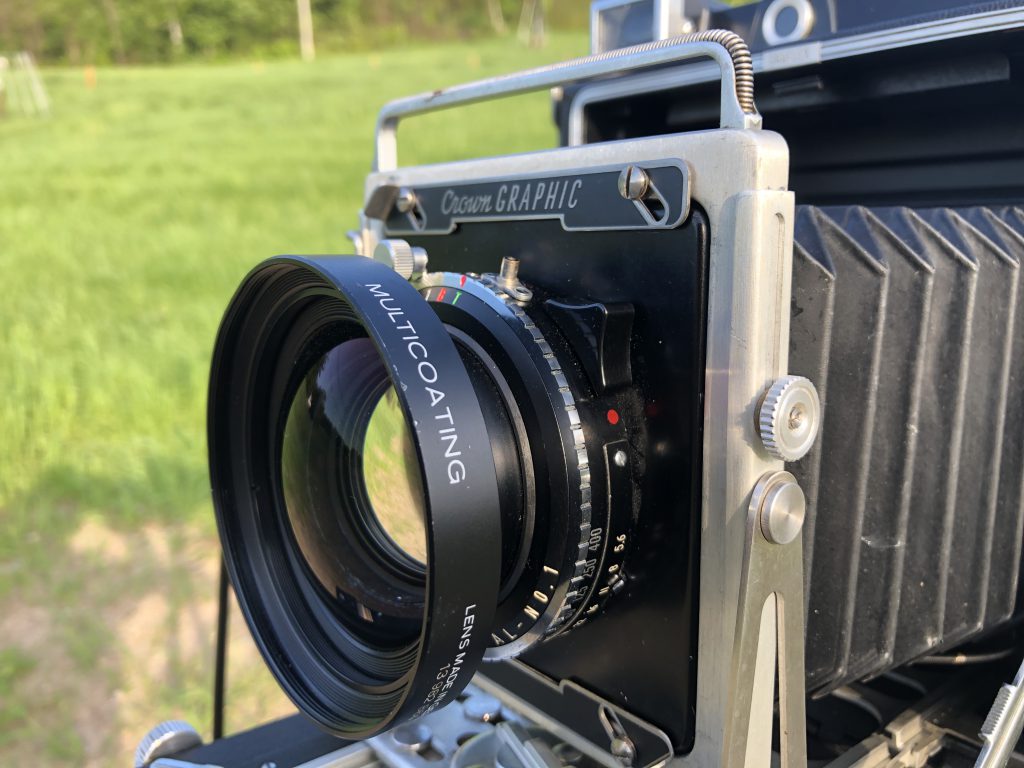
Lenses
When it comes to lenses you can go into a deep rabbit hole, but we’re just covering the basics here. When it comes to LF lenses there are two basic parts the lenses themselves and the shutter unit. Usually, these two are interchangeable and you can even removed or flip elements to change the focal length of the lens. However, you might need to get a shutter that matches the lens. The best part is that these lenses are universal, meaning you just have to get the proper board and you can swap lenses between cameras. The one thing you need to look out for is image circle, not all LF lenses are created equal. Lenses designed specifically for 4×5 won’t work well on any film size bigger, but your lenses for 8×10 will be perfect for anything smaller.
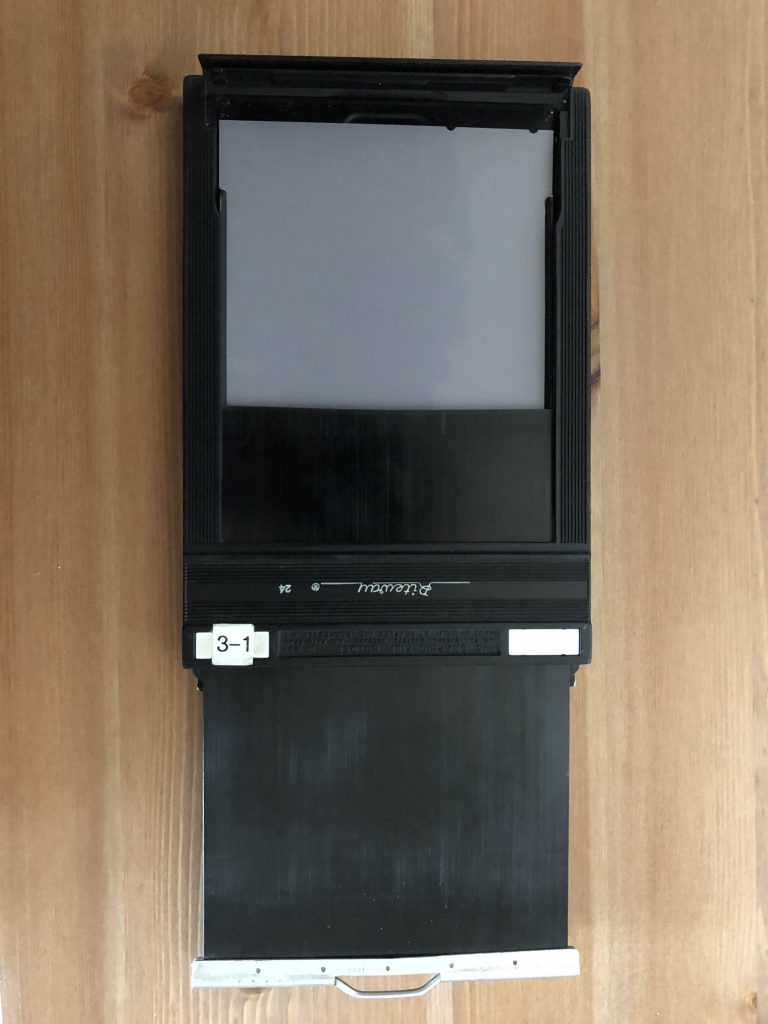
Film & Loading
Unlike smaller formats, large format film comes in sheet sizes, one shot per sheet. These sheets must be handled in complete darkness of either a dark tent or a changing bag. If you’re thinking how to make sure you’re loading the film into the holders correctly. Well, the manufacturers thought of that also and supplied each sheet with an indicator. This indicator takes the form of a combination of notches, the big manufacturers such as Kodak, Ilford, and Fuji use these notches as code to let you know what film you’re actually loading into the camera or if you don’t have a box and come across pre-loaded holders you can feel the code and line it up with online publications. Some smaller manufacturers will just but a single notch to help with loading. Usually, if you’re loading with the holder opening facing you in the bag, the notch must be towards you and on your left side so that the emulsion side is facing up, so you aren’t shooting through the film base. However, if you prefer to load in the opposite direction, you’ll need to invert change the orientation of the notch. To help get your hands used to loading up film it’s best to get some throw-away sheets and practice in the light first, then switch to doing it with your eyes closed then into the bag. Since the sheets are already exposed to light, you can take out the darkslide to check to make sure you did it right. Then do it for real, all you need is practice and you’ll get it right when it comes time to do it for actually shooting.
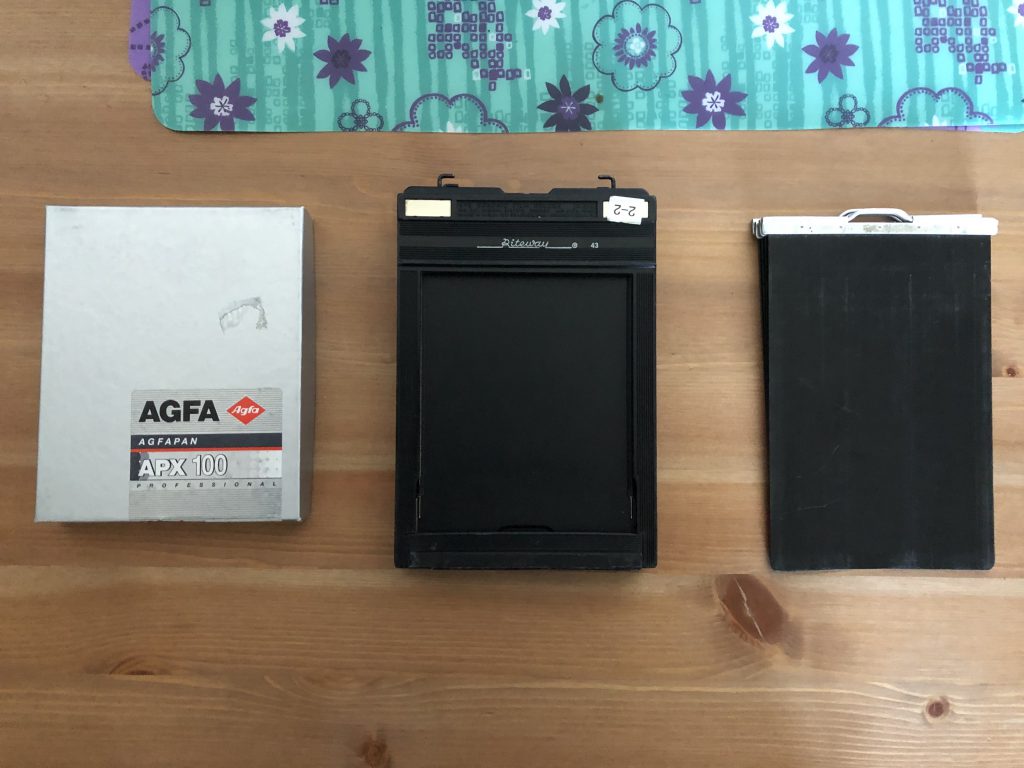
Loading film into the holders is a test of patience and skill and if you’re new to the whole deal it’s best to get some old sheets of film and work in the light first before dropping cash and loading up for real. Once you have a system down it’s best to stick with it. In Alex’s case, he lays everything out with the box of the film on the left, empty holders with the opening towards him, and then the darkslides on the right. He can load up to 8 holders at a time in the change bag he uses and he always wears gloves.
Basic Operations
While the cameras are fairly easy to get your hands on, operating them can be a bit daunting especially at first. The best thing you can do is decided on your own process and stick with it, and that goes for everything. As with anything that we present is just how we do it, feel free to modify it to your own personal tastes. When it comes to working with Large Format, you can be fairly quick on blasting through your frames, but we do recommend a bit more deliberation. The best thing is your own eyes when you see a scene you want you can get started. Setup the camera and then pick then lens you want. Once there, open the aperture to the widest point and open the shutter. You can then work on your composition using various movements and focusing. This is where your loupe and focusing cloth come in handy. When you’re happy with the composition, close up that shutter, then meter the scene. You can use reflective or incident metering based on your subject and your own personal preference. Then set the shutter speed and aperture on your lens and cock the shutter. Insert your film holder, be sure to double-check the exposure settings and ensure your shutter is closed before pulling the darkslide. Once you’ve exposed the scene, slide the darkslide back in, making sure to indicated that it’s been exposed by using whichever side you have picked to show it’s been exposed. Then wash, rinse, and repeat, the more you get out to do this, the easier it becomes. But try not to get complacent, there’s no protection for any missed steps or mistakes.

Pacemaker Crown Graphic – Fuji Fujinon-W 1:5.6/125 – Rollei RPX 25 @ ASA-25 – Pyrocat-HD (1+1+100) 12:00 @ 20C
The Basics – What you need to get started
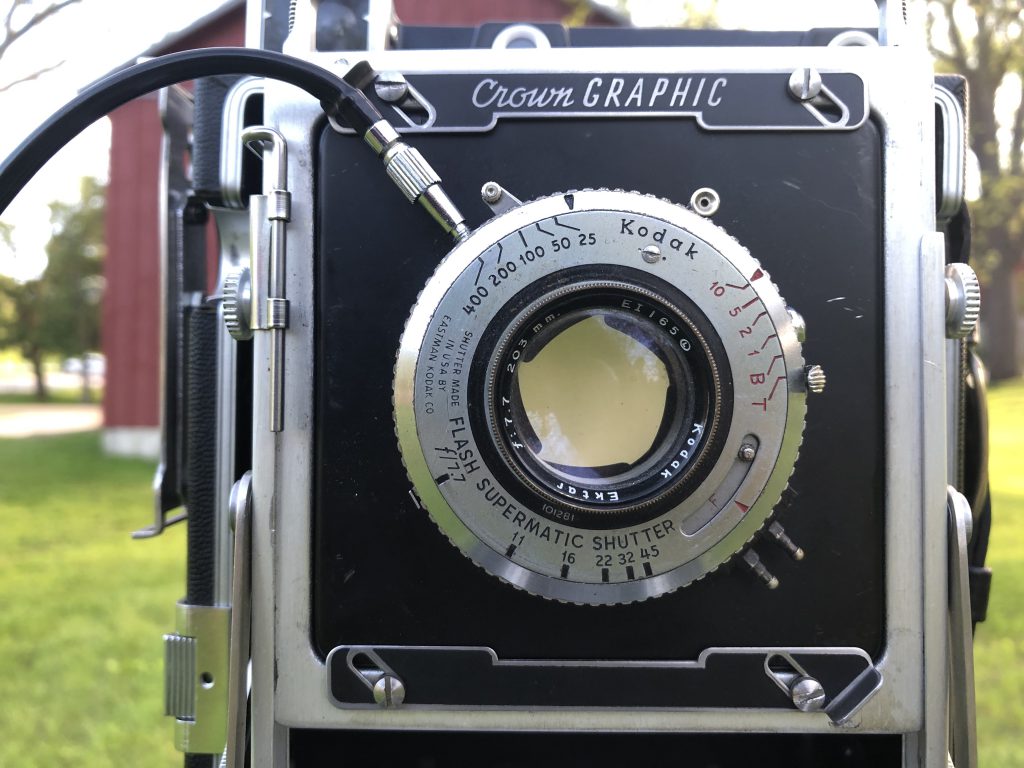
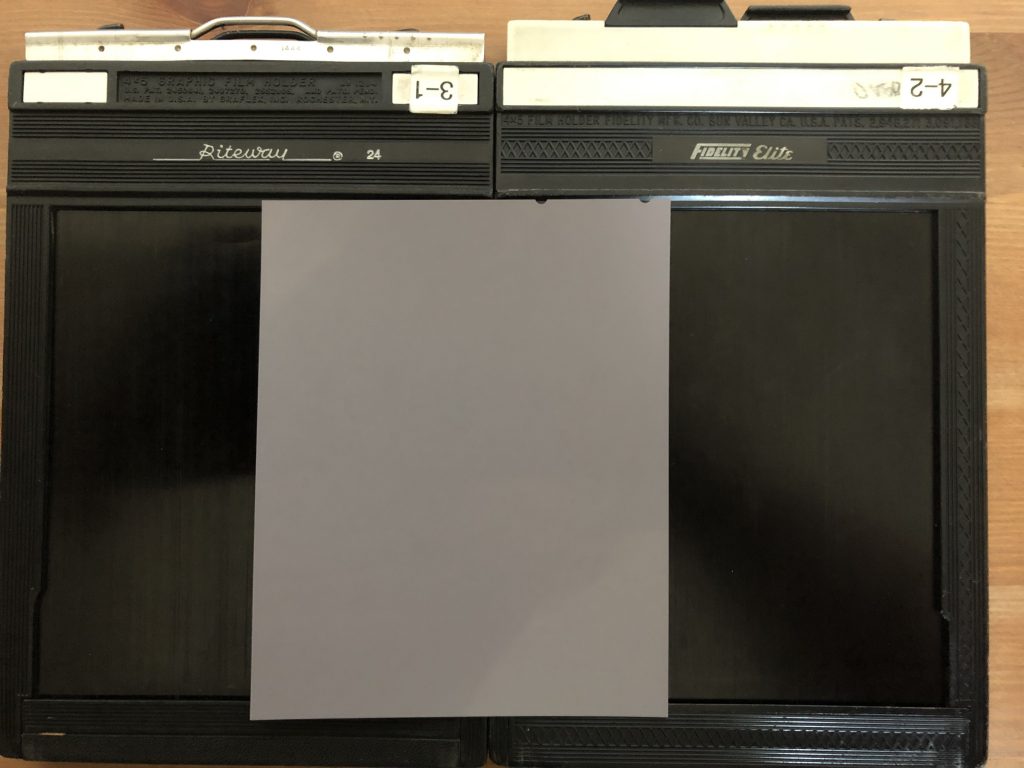
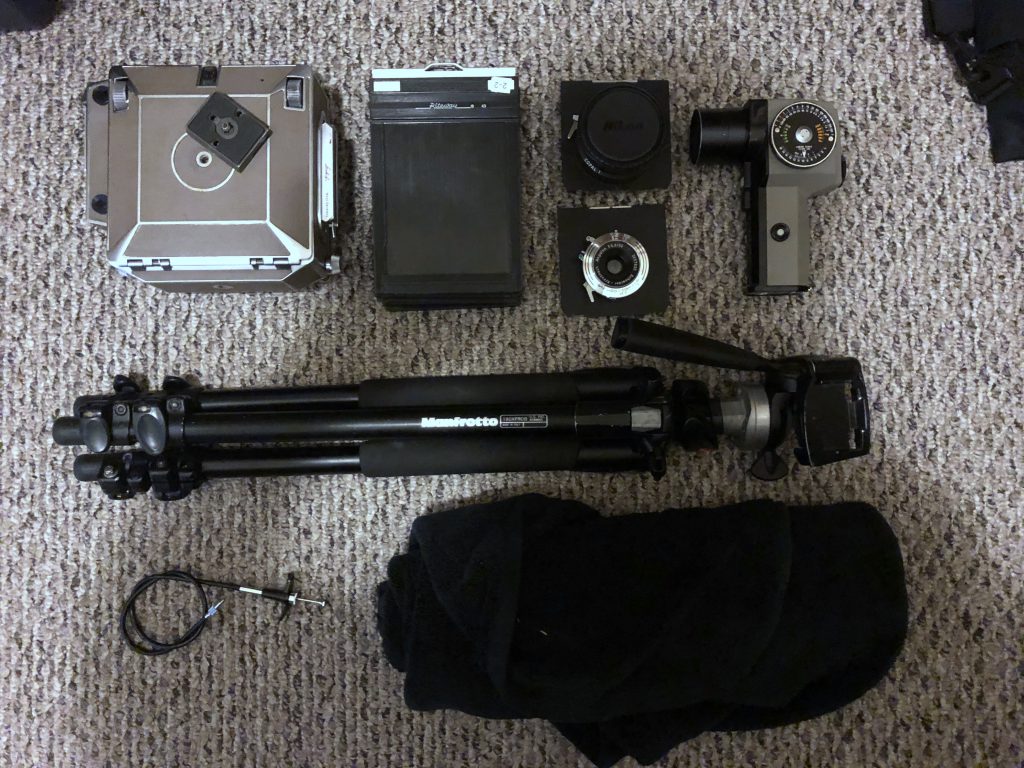
Getting started with Large Format is not as hard as you think, while the initial payout is a bit of an investment it is important to think of it as an investment. First and foremost you’ll need a camera, these days certain large format cameras will go for a low price, you can basically get a monorail camera for a song and most come with a lens already and in the cost, you’re basically paying for the lens. Although a Press Camera is also a good starting point. Next, you’re going to need a lens, just start off with one, somewhere in the 125-150mm range if you’re starting with 4×5 this will give you roughly a ‘normal’ angle of view. While there’s a certain draw to Kodak Ektar lenses (The 127mm f/4,7 is a classic) these are getting on in age and the shutters are notorious for being hard to work on, you might want to look at something a little more modern, Fuji, Nikon, or Schneider-Krueznak provides excellent glass. Just make sure that the lens you get will work on the film size you have. You’ll, of course, need film holders, best go with some used models first which are fairly inexpensive, the two main brands are Riteway and Fidelity Elite. If you are buying used, give ’em a good clean out before using them. Now you’ll just need a box of film, start with lower cost film Fomapan or Arista EDU brand this means that if you mess up you aren’t out a couple of bucks a sheet. You’ll then need the extra accessories, a focusing cloth which can just be a black towel from Walmart a proper light meter (don’t use your phone app) and if you want a viewing loupe (this will help with focusing). A mechanical shutter release and a tripod are also good items to get.
Processing
These days there are several options for processing your large format film at home. The simplest and one we don’t recommend is the taco method which involves curling your film and using an elastic and putting it in a tank. While cost-effective you need to adjust everything to allow for complete chemical coverage. If you are going to use a Patterson Tank the best thing to get is a Mod 54 which allows for you to put six sheets of film onto a rack. These are known to be frustrating to load and the sheets come out of their notches. For James, the fastest way to process large batches of sheet film is using a Jobo processor, and we’re talking the automatic rotating using with water bath and tanks that hold six sheets at a time and take care of all the agitation for you. Now the system isn’t cheap, but if you’re looking at getting into a Jobo system, the best bet is to get over the CatLABS. But if you don’t have the cash for a Jobo setup, a simple BTZ tube and a rotating base will run you far less, a basic tube will hold 1-4 sheets (2 if you don’t have the spacers) and won’t cost an arm and a leg. And finally, there’s the SP-445 system which is Alex’s go-to and allows for 4 sheets of film to be processed at a time and is a relatively inexpensive purchase.
If you want more, be sure to check out the Large Format Photography Podcast it’s run by a couple of amazing blokes. Another option is to get in touch with Mat from the Film Photography Podcast by emailing podcast@filmphotographyproject.com and be sure to check out his amazing work on his Flickr page and Website.
Post Show Updates
Thanks to Simon from the LFPP for the following updates and corrections
– Darth Vader’s lightsaber prop is the flashgun from Micro Precision Products (MPP) only the Skywalker hilt is a Graflex.
– Kodak released several versions of their Ektar lens for Large Format work in addition to the 127mm and 203mm that we mention, they also released a 152mm f/4.5 Ektar.
Looking for a good spot to get your gear and material fix check out Burlington Camera (Burlington, ON), Downtown Camera (Toronto, ON), Film Plus (Toronto, ON), Belle Arte Camera (Hamilton, ON), Pond’s FotoSource (Guleph, ON), Foto Art Camera (Owen Sound, ON). Out West there’s The Camera Store (Calgary, AB) and Beau Photo Supply (Vancouver, BC). Additionally you can order online at Argentix (Quebec), buyfilm.ca (Ontario), the Film Photography Project or Freestyle Photographic. Looking for development options, check out these labs that have our support, Boréalis Photo Lab, Old School Photo Lab, The Darkroom, and Film Rescue International.
Also you can connect with us through email: classiccamerarevivial[at]gmail[dot]com or by Facebook, we’re at Classic Camera Revival, Twitter @ccamerarevival, and Instagram (@classiccamerarevival)!