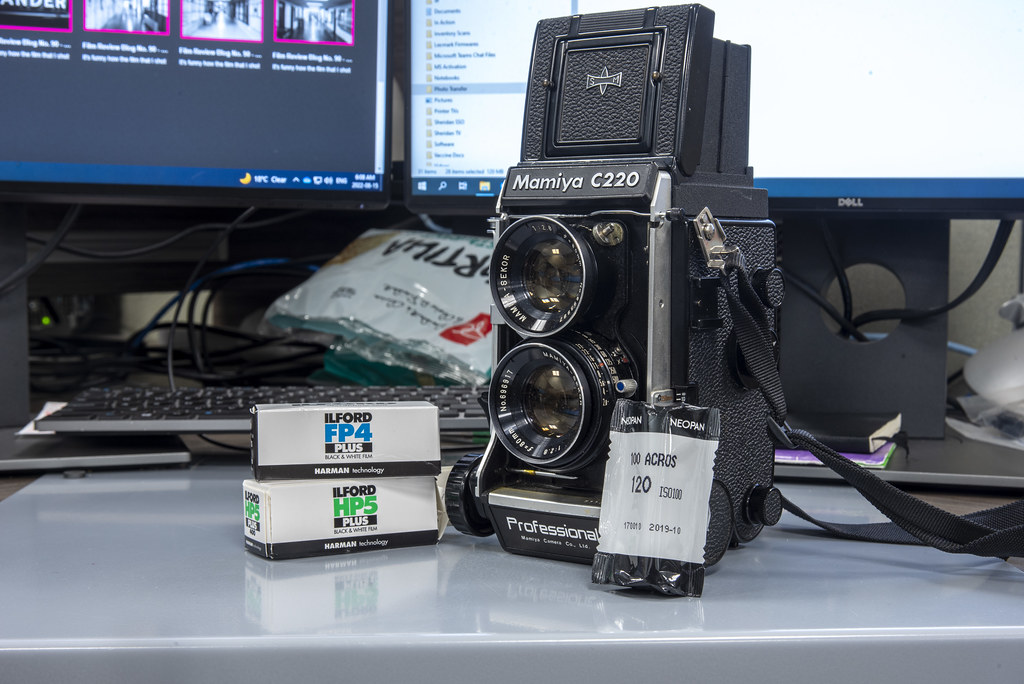
The first thing you’re going to think when you take a look at a C220f is that this is going to be a heavy camera, and then you’re going to pick it up and notice that it is relatively light for its size and form factor. I love a good system camera, but outside of the SLR world, there isn’t much in the way of system cameras in the medium format realm. At least until you look up Mamiya’s rather interesting C-Series of TLRs, they are proper TLRs in every way, but it’s also a complete system camera with interchangeable lenses, grips, and finders; the only thing they’re missing is a motorised advance. Thanks to Bill Smith for loaning out his complete C220f kit for this review!
Camera Specifications
Make: Mamiya
Model: C220f
Type: Twin-Lens-Reflex
Format: Medium Format (120/220, 6×6)
Lens: Interchangeable
Shutter: Seiko Seikosha-S Lens Mounted Shutters, 1″ – 1/500″ + B
Year of Manufacture: 1982-94

Background
When Japanese camera manufacturers began to dip their toes into the TLR market, they took their design cues from Rolleicord and Rolleiflex cameras from Germany. Mamiya went somewhere different with their opening offerings in TLRs. They merged design ideas from Franke & Heidecke, Kodak, and Voigtlander. Beyond the change in design, these first TLR offerings were pretty standard. Released in 1948, the Mamiyaflex Jr. offered a fixed lens Towa Koki Neocon 75mm f/3.5 lens, taking classic 120 films. Still, focusing was achieved through a linked gear system (similar to the LOMO Lubitel 2 and Voigtlander Brilliant). Film advance was achieved through the standard red window and was aimed at the mature market. The far more advanced Mamiyaflex Automat A, released in 1949, gave a much more familiar TLR experience. Focusing was done through a moving front standard, and the lenses were both Olympus Zuiko 75mm f/3.5. A pair of dials controlled the aperture and shutter settings, although located below the taking lens rather than between the viewing and taking lenses. The film advance used the standard crank, the automatic film stops, and a cock-on-wind for the shutter. In 1951-2, Mamiya released two consumer TLRs, the Mamiyaflex I and Mamiyaflex II; these used the linked gear focusing method and Setagya Koki Sekor 75mm f/3.5 lenses but included automatic film stops and cock-on-wind for the shutter. These were replaced in 1954 by the Mamiyaflex Automat B; similar in design and function to the Automat A, the B used Sekor instead of Zuiko optics. Additionally, exposure controls were mounted on the lens rather than on separate dials. Automat A received two updates, the AII and AIII, in 1955 and 1956, respectively, and Automat B received an update on the BII in 1956. Of course, everything changed in 1956; Mamiya released the Mamiyaflex C. The Mamiyaflex C proved to be a game-changer within TLR circles and even caused Franke & Heidecke to scramble to come up with some response as the C was a system TLR. The only other camera that could claim this was the Koni-Omegaflex. The Mamiyaflex C took many technological improvements built into the A & B model TLRs including automatic film advance but moved the focusing method to use bellows, allowing longer lenses to be included. Mamiya used their Mamiya-Sekor optics, and these first-generation lenses used Seikosha-MX shutters and came in 65mm, 80mm, and 105mm offerings and are denoted by all chrome barrels. And yes, Mamiya also allowed for mid-roll changes of optics, a big draw for professional photographers. In 1958 Mamiya released the C2; while almost identical to the original C, there were several improvements. First, a longer and flatter base eliminated the need for front feet. Most notable is the addition of a second focusing knob allowing photographers to use either their right or left hand to adjust focus. The right side had focusing scales for the 80, 105, 135, and 180mm lenses and the left had an exposure correction scale. The C3 in 1962 dropped the ‘flex’ from the camera name, and a set set of optics featured the Seikosha-S shutter. The C3 also featured a crank-style film advance which also allowed for cock-on-wind. The C3 was short-lived, replaced in 1965 by the C33 (aimed at professionals) and the C22 (aimed at amateurs), although the C22 would not be released until 1966. The C22, despite being aimed at the amateur market, remained a capable camera. Unlike the C33, the C22 used the older knob-style film advance and required a separate step to cock the shutter, but the film advance was still automatic. While a red window was present, it was only to check and see if the photographer had film loaded. The C22 could use all the same optics as the C33. This was also the first camera from the C-Series to use 220 films but required the photographer to install a separate film back. Released in 1968, the C220 marked a significant jump forward since the initial release of the Mamiyaflex C. These cameras were made from far lighter materials than the earlier models and returned to a leatherette covering. While it retained the knob film advance (but did include a folding crank) and required the photographer to manually cock the shutter, the camera did include a reversible pressure plate to allow for either 120 or 220 films without needing to swap out the entire back. Mamiya released an updated version of the C220f in 1982. The C220f would automatically adjust the counter to 24 frames when the pressure plate was set to the 220 settings; the film advance knob removed the foldable crank but relocated the knob and increased the size. Also adjusted how the film back was opened from the C220. Production of the C220f lasted into 1994, well past the TLR’s prime within the photography market.


Impressions
When you first look at the Mamiya C220f, your first thought is that the camera will weigh a tonne. And while it certainly has a certain heft and weight, the camera is reasonably light, given what the camera is. Of course, this also depends on what lens you have mounted; the 180mm will give you a heavy camera compared to the 80mm lens. If you’re using the lower profile lenses (55mm, 80mm and 105mm in my case), the camera is lightweight and well-balanced. The copy I’m reviewing comes with the left-handed grip (which seems to be a thing for Mamiya); while I found it helpful with the longer lenses, it started to get in the way, especially if you’re used to having no grip on your TLRs. Once you’re used to the camera layout, it all makes sense. The best feature of the whole camera is the twin focusing knobs on either side of the bellows, allowing either a right or left-handed person to focus the camera quickly, and the extensive bright finder (with matched optics) makes life easy. The bellows also include a focus chart because once you start with longer lenses, pulling the bellows back into the body won’t be infinity; the chart is easy enough to read. Some controls are less than obvious, the first being the film door release; if it weren’t for the manual, I probably never would have figured out to push the top reel post to open the back. Also, the lens mount and dismount took a bit to figure out, especially with the lock/unlock knob. Thankfully, the film advance knob is smooth, easy to operate, and not as awkward as I expected, although a crank would have been an excellent item to retain. Of course, being a system camera, the C220f is customisable to almost any situation. And Mamiya released a tonne of accessories for the system; in addition to the standard waist-level finder, three Porrofinders were available; one included a CdS-based lightmeter and another included parallax correction. A left-handed grip and a pistol grip, and a parallax correcting tripod mount.


Experiences
If this is your first time working with the C220f, read the manual before you start working with the camera. The C220f operates differently from most other TLRs, but that’s also good. I took the time to read through the manual twice before I could even get started. Loading up the film proved the most frustrating, as the release to open the back (unless you read the proper manual) is not straightforward. You need to push down a lock, then press the takeup spool post knob. This is a different method from even the C220! But you can at least lock the spool posts to an open position, making loading and unloading the spools easy. Thankfully, it’s a straight pull from the supply spool to the takeup spool, then use the advance knob to wind the film until the start mark is aligned with the start mark on the camera body. This is a small gap between two chrome markers; a red dot might have been a good idea. Then you can wind until the advance knob stops on frame one; this is automatic, no red window. One of the best features is being able to hot swap the lenses, and mounting and dismounting the lens is also a two-step process (seems to be a theme); first, you have to close a shutter on the camera body; this is important if you are swapping out a lens mid-roll. You set a knob on the side to unlock, pull the retaining frame out and swap in the new lens. Make sure to lock and open up the curtain before taking pictures. Thankfully there is a big red flag in the viewfinder when the camera is unlocked. The waist-level finder is big and bright, and the best part is that the taking lens is matched with the viewing lens, so there’s little to no guessing on how to frame your images. There’s even a handy scale for helping adjust for parallax. Although if you’re used to TLRs, framing with the 80mm lens will be easy, with the longer lenses, it might take some effort to get things right. Focusing is easy; the bright screen and a full magnifier can help nail that focus, especially when working close. There’s also a proper scale on the side of the camera bellows to help you set the infinity focus for the different focal lengths, and all available lengths are noted on the camera body. There is no built-in lightmeter on the C220f, so I went with my trusty Gossen Lunasix F for these rolls, but there is an on-body cold shoe, and the side-mounted left-hand carry handle also has a cold shoe. A meter light, the ReveniLabs Meter, would make a perfect match for this camera. Once you get out and use the camera, that two-step process will come into play as, unlike the C330f, you must manually cock the shutter after each shot. Thankfully you can’t accidentally take multiple exposures; there is a lock to prevent that (but you can override this). After advancing the film, I found the best way to leave the shutter un-cocked. Then, when you set the exposure on the lens, cock the shutter as the final step. The three controls are close enough to each other that you can get into a good groove. I was a little concerned about having the film advance as a knob rather than a crank, but the knob is big enough that it is comfortable, easy to operate, and relatively quick. Once the roll is done, you wind up until all the backing paper is taken up.


Optics
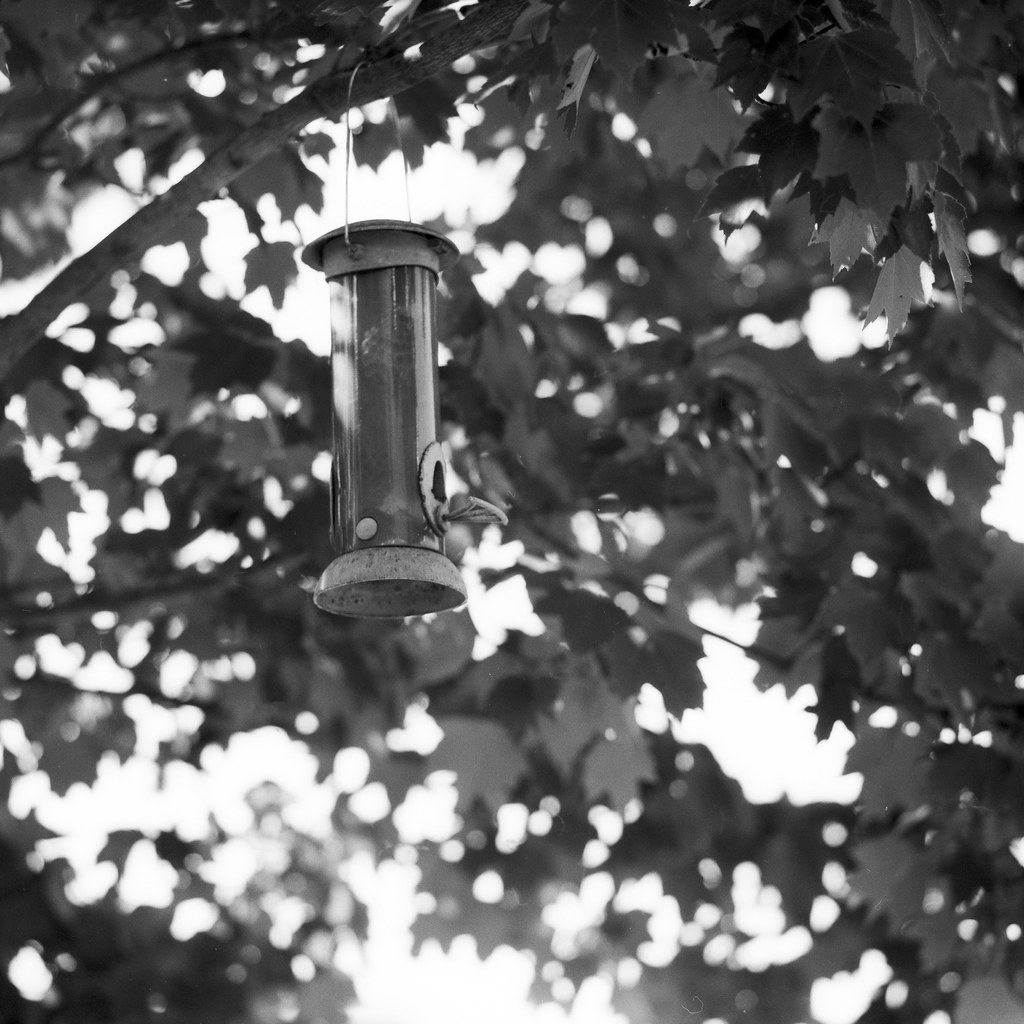
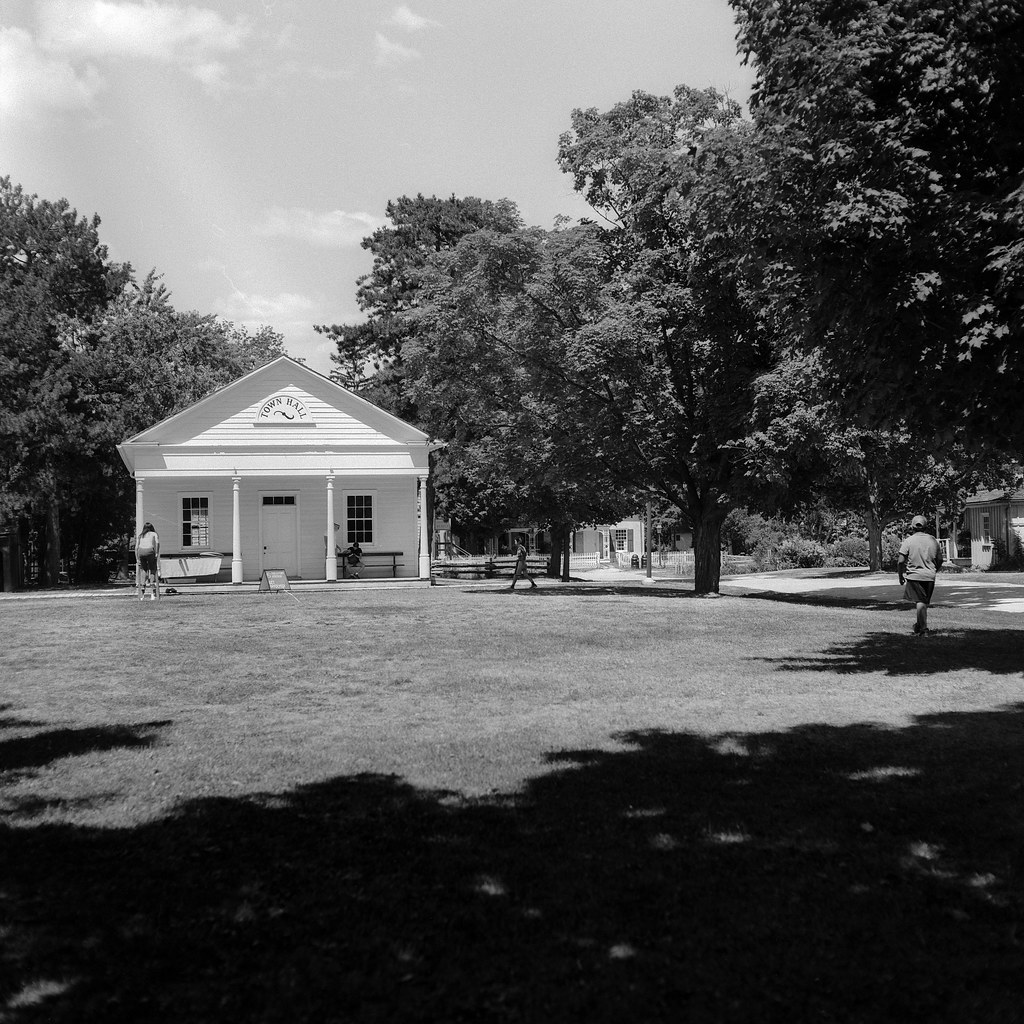
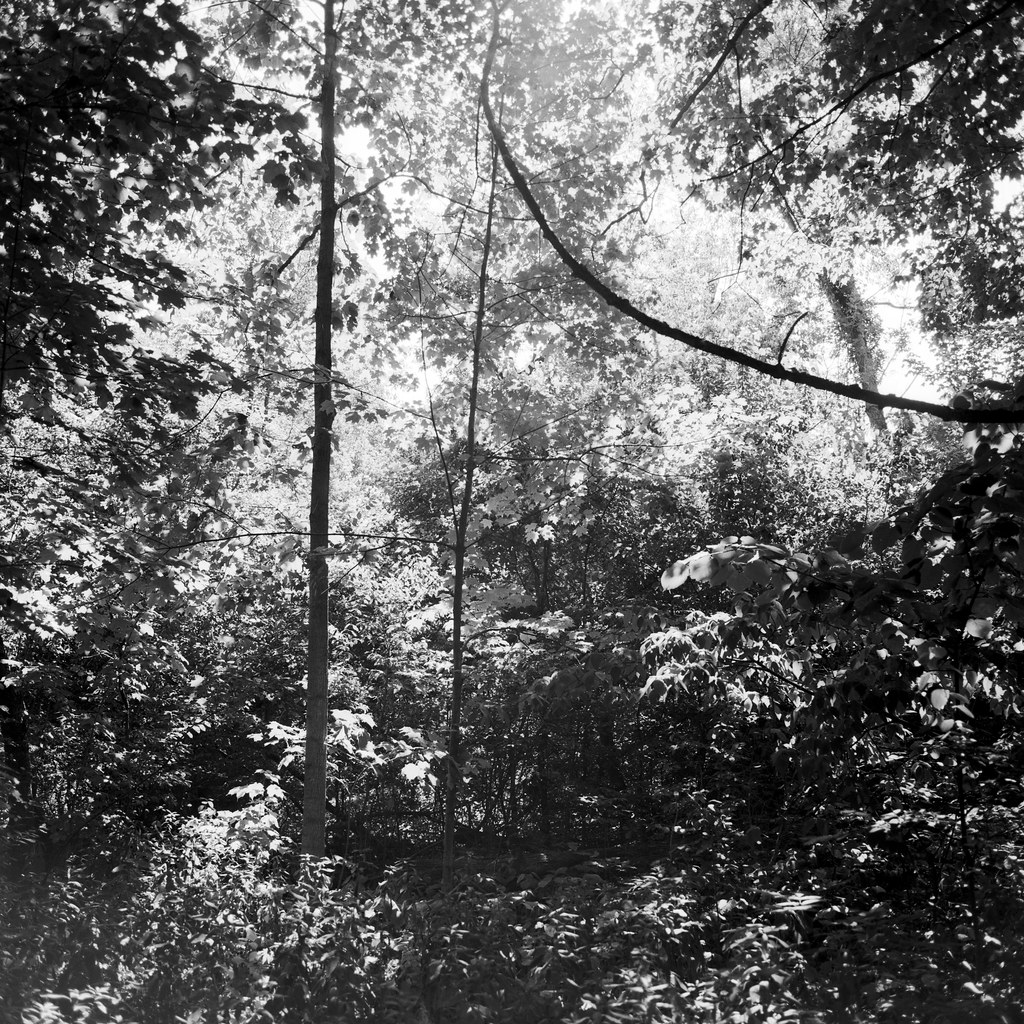
One of the key factors in the Mamiya C-Series is the ability to swap out lenses. A tonne of exceptional optics is available for the C220f as it is similar to all the later model C-Series TLRs, starting with the C3. Lenses before the C3 (C and C2) may not work due to the switch to a different shutter. It’s best to stick to the third generation of optics for maximum compatibility. But with these new lenses, you have focal ranges from 55mm to 250mm in a series of prime lenses (34mm to 138mm equivalent to 35mm). These are all Mamiya-Sekor glass, and there have been many variations throughout the year. And let me say, the optics on this system are something special; for this review, I had the chance to use all four lenses loaned out, from the 55mm to the monster 180mm, and I honestly cannot pick a favourite. These lenses have character, the 105mm and 180mm provide some beautiful out-of-focus rendering, while the 80mm and 55mm provide clean, sharp, contrasty images. The biggest factor is that once you get beyond the 135mm lens, the barrels add extra weight to the front of the camera. I found the handling went downhill once I had the 180mm lens mounted, but the other three did not change the overall feel and balance of the camera. You also have to pay attention to the focus chart on the bellows frame; this will tell you where to set the bellows for each focal length to set your focus to infinity. It took a bit of reading to figure out how to read the chart, but that seems to be the theme of this camera. If I were to put together a system, I would suggest the 55mm, 80mm, and either the 105mm or 135mm lenses.


Lowdown
If there’s a running theme for the C220f is RTFM! Seriously, this camera takes everything you know about TLRs and turns it upside down. While some aspects of usability are the same, others are entirely different. But I can also see the draw of such a camera for wedding photographers, TLRs offer the ability to continue to see the scene even after you’ve tripped the shutter, and the square format provides you with the ability to print either in landscape or portrait orientation without having to turn the camera around. On the used market, the camera is fairly available and is a lot less expensive than I expected, but it certainly isn’t a bargain. Most cameras up for grabs come with the standard 80mm f/2.8 lens and, more often than not, the blue-dot version. Prices range from 460$ to 540$ for good examples with at least one lens and a waist-level finder. The lenses, however, can be costly, the third-generation lenses will run above 250$, but that is also an average across the board; the older lenses are cheaper, but you run into them not working with your camera. There are two things that keep me from getting into the C220f, and they are the two things that set the camera apart. The first is size, I love my Rolleiflex, specifically for the small form factor, and the C220f is a beast. Second is the cost; while getting a camera with a single lens is affordable, given that the C-Series is a system camera, I wouldn’t want to stick to one lens; I would want to get at least three that will add up over time. So if you are looking for a TLR that can do more than your average Rollei or Yashica, the C-Series is certainly a system that might be worth a second look.
Further Reading
Don’t just take my word on the C220f; you can check out the reviews by other awesome camera reviewers!
Emulsive – Camera Review: Mamiya C220 Professional TLR
Beyond The Aperture – Review: Mamiya C220 Twin Lens Reflex Camera
Room 111 Photography – Mamiya C220f Professional TLR
TLRgraphy – Why I love the Mamyia C220
1 Comment