One of the more interesting parts of B&W film photography is the ablity to adjust how the film behaves. There are many different ways of adjusting how the film looks, you can over or under expose the film, or push/pull the film in development. You also have various different developers to adjust how the film looks and different dilutions. But there is also the ideas of adding coloured filters to your lens to change what light and how much light hits your film. Now it might seem weird to put coloured glass over black & white film, but it can adjust and change how different colours are rendered by the film stock itself.
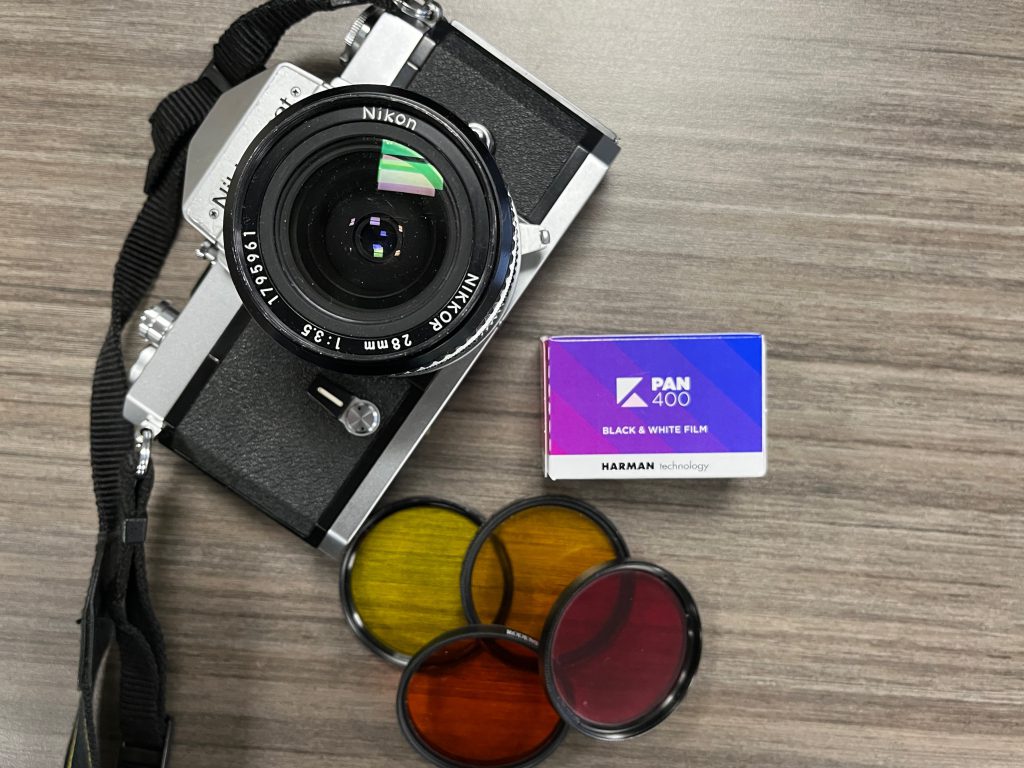
For this post I will be shooting a 24-exposure roll of Kentmere 400 pan, rating it at ASA-400 and developing the film in Adox FX-39 II. I’ll be shooting twenty different scenes each scene shot five times under different filters and they will be displayed going from left to right, no filter, pale yellow, deep yellow, orange, and red. These filters are also called “minus blue” filters, so they cut the amount of blue light hitting the film, rendering the blues in your image darker, most notably the sky. You can also see these sorts of filters called contrast filters as they can also increase the contrast on the film. The one thing that many people, myself included, tend to forget when it comes to adding these filters to your lens is that they do cut down on the amount of light that is hitting the film. If you’re using a camera with a functioning TTL (Thru-The-Lens) meter, you don’t have to worry about any compensation. And I could have used one my cameras with a solid meter to produce the images in this post. But with the deep freeze we were experiencing here in Southern Ontario I went with my Nikkormat FT2 and used the Gossen Lunasix F. Since I was using an external meter I had to compensate for the filters to get an accurate meter reading. You can do this in two ways, you can open up the aperture or slow the shutter down. I wanted to keep a consistent aperture across all the images, so I went the shutter speed route. That’s a nice easy way, as you slow it down one click which is a stop. So if I started with a meter reading of 1/500s, one stop more is 1/250s and so on. The amount of compensation is determined by filter factor, if there’s a filter factor of two, you’ll need twice as much exposure, so you have to over expose by one stop, a filter factor of 8, is eight times as much or three stops. Thankfully, companies like Tiffen publish both the filter factor and the number of stops to over-expose by, others you have to dig a little bit around to figure them out. Probably the best thing to do, is create a list of your filters, the filter factors and the over-exposure stops needed. The last thing to note is that even though you are over-exposing the film through your metering, you should develop the film normally, no need to pull your development, the over-exposure is to compensate for the filter to ensure a normal amount of light hits the film. Below is a basic chat with the three main coloured filters you’ll encounter. Of course, this list is not exhaustive, it is always good to look up as much as you can on your filters. Later on in this post I’ll discuss some of the other filters that I use and you may run across in your photography journey.
- Yellow – Filter Factor 2 – Increase by 1-Stop
- Orange – Filter Factor 4 – Increase by 2-Stops
- Red – Filter Factor 8 – Increase by 3-Stops


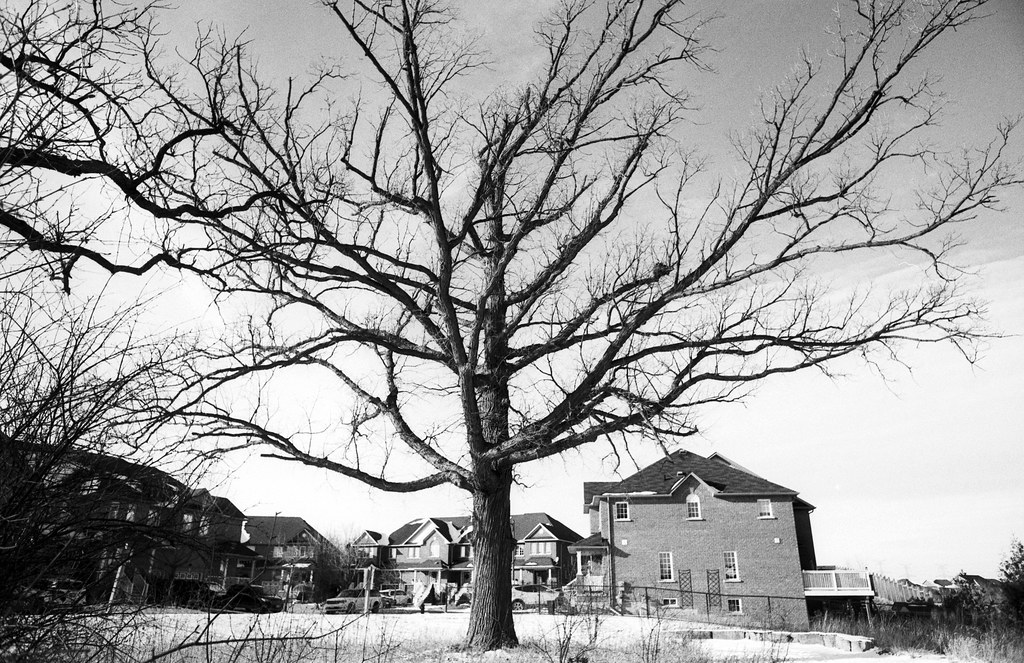
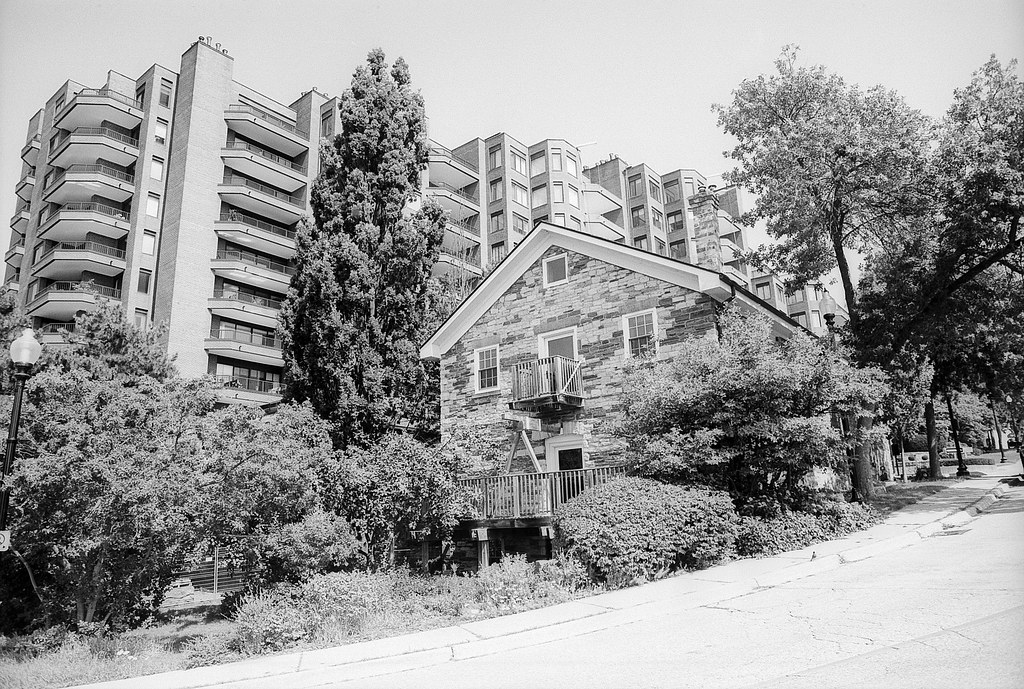
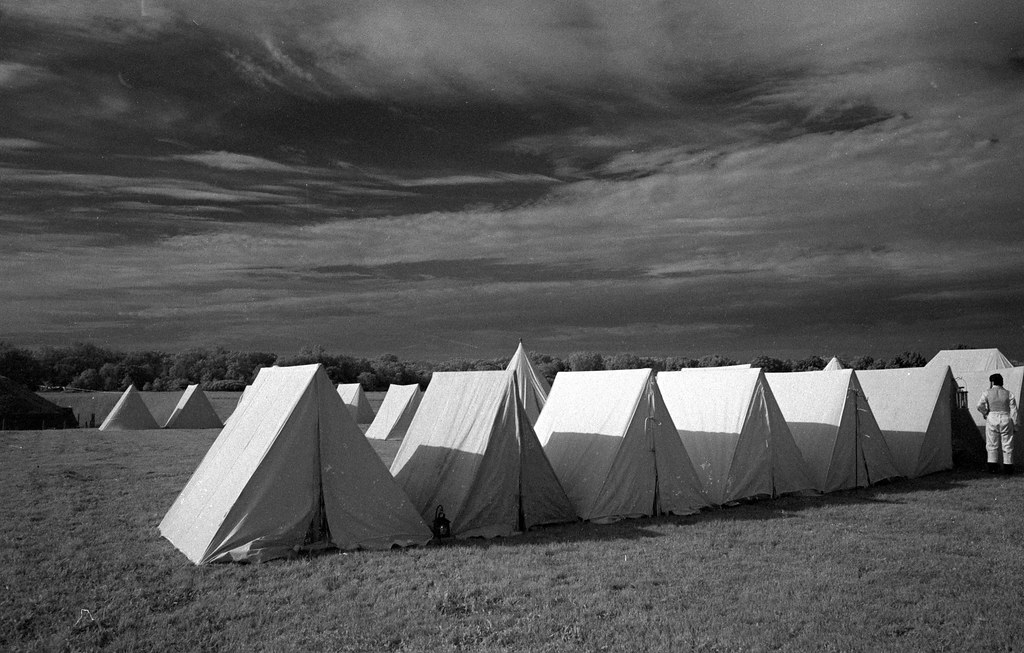
In the above examples, I only got three workable groups due to my mistakes in the field. For context from left to right, there is the image without a filter: yellow-8, yellow-15, orange-22, and red-25. I should have taken a colour shot as a reference image, but it was super cold and I was already a little flustered getting out. As you can see, I got out on the right day to try these out, as there was a lot of sun and bright blue skies, and Kentmere 400 responded perfectly to the filters. I adjusted my exposure by one stop for the two yellow filters; you can see the same results in darkening the skies with these. The effect is more dramatic once you get to the orange filter, a two-stop adjustment, and the darker skies with the red-25 filter, which had a three-stop adjustment. You can also see, especially in the last one the darkening of the building itself, which is blue in colour as you add in those contrast filters showing off the reason why these are all called ‘minus-blue’ filters. Many of these effects can also depend on the film you’re shooting behind the filters. A film with IR and near IR sensitivity will dramatically increase these effects; Rollei Retro 400s and Retro 80s (and various films with the same base emulsion) come to mind.

Now these are not the only filters you will encounter, there are a tonne of other options specifically designed for B&W films. A Green Filter is useful in a couple of ways, the first is for scenes that have a lot of greenery in it, think the woods in spring and summer. This filter helps lighten the green colours in your scene, making them brighter rather than darker. Most Green Filters have a filter factor of 4, especially the Green-11, so you have to over-expose by two stops when metering externally. Although I also like to put a green filter in front of orthochromatic films like Ferrania Orto, Ilford Ortho+, and later this year, Foma Ortho 400. This makes the film close to being panchromatic and gives a rather nice rendering of the tones. Another filter that you might run across is an Infrared filter, these are deep red, almost completly opaque. These are designed for films that have infrared or near infrared sensitivities. The main one on the market is Rollei IR400, but you also have Ilford SFX200, Rollei Retro 80s, Rollei Retro 400s, and similar films. You will often find these filters marked R72 or 092 or 89b, these will have a factor of 16, which means a four stop over-exposure. They also don’t work on every film so they aren’t for everyday use. They also can be fairly expensive for a good copy.


A good set of filters is an excellent tool to have in your camera bag, but it’s important not to buy the cheapest filters you can. What’s the point in having good optics and throwing a 5$ piece of glass in front of the lens? Spend the money, Tiffin, Kenko, Rodenstock, and Hoya are all excellent names with good products. Most of my filters are Tiffin, mainly because they sell wonderful basic contrast filter kits that comes in a nice carrying case. Also select the kit that will best suit your lens size. Then either buy additional kits for different lens sizes, or buy the largest one needed, then use step down rings. Don’t ever use a smaller filter on a larger lens, you’ll run into image quality issues. If you are starting out, the Tiffin filter kit has a Yellow-8, Red-25, and a Green-11 which is enough to get you going, adding an Orange-22 filter would add a nice middle between the yellow and red. There are some of the school of thought that a yellow filter is a must in front of all panchromatic films, for me, I find that you have to gage each situation differently, and pick the right filter for the conditions. If are you new to using filters, it is best to start with cameras with TTL metering, it will help get your feet wet before trying to figure things out on an external meter with EV settings and which way to turn the dial. One thing to note at this point, this trick doesn’t work on digital cameras, except for the Leica Monochrom with it’s amazing sensor that allows it to mimic how B&W film responds to these filters. That said, you can mimic these effects in post-processing software such as Nik and Lightroom there are buttons to apply the different filter styles to your desaturated digital images. I love using a yellow filter in the summer on partly cloudy days, I do want to try to use the green filter in foliage later this year when the weather allows.