It was the 6th of November 1837, and Lower Canada had erupted in open armed revolt against the Colonial Government. The Patriotes under Louis-Joseph Papineau and many others fuelled by the ideals of the American Revolution, French Liberty, and Republicanism. They decided that they would only rid themselves of the influence of the British Ruling Class, a group of Tory elites organised into a group known as the Chateau Clique was to begin a revolution when their demands for reform were ignored. There had been some communication between Lower Canada Patriotes and the radicals in Upper Canada under William Lyon MacKenzie. And while a coordinated uprising would have been of greater efficiency, the fact was that by November MacKenzie was far from ready. Unlike Papineau, MacKenzie was less a leader and more an orator. Sir John Colborne, now the Lieutenant-Governor of Lower Canada had no trust in the local militia, fearing that they might turn in support of Papineau did not have the regular troops to soundly defeat the rebellion prevailed on Sir Francis Bond-Head to send reinforcements. Bond-Head, despite knowing the threat that MacKenzie posed ordered nearly the entire garrison to Lower Canada to support Colborne’s efforts. Many saw this as a short-sighted move, among them James FitzGibbon, a former British Army Officer who was serving as the acting Adjutant-General of the Militia. FitzGibbon feared that if MacKenzie rose up in rebellion, the militia might join the rebel cause. But Bond-Head continued to downplay the treat to help soothe the Province. MacKenzie saw these two events as an opportunity and gathered his supporters at Doel’s Brewery in Toronto to discuss his plan.

Mamiya m645 – Mamiya-Sekor C 35mm 1:3.5 N – Ilford FP4+ @ ASA-125 – Blazinal (1+25) 9:00 @ 20C
There were still many in the movement who did not like the idea of an armed rebellion, such an act if they failed would mean the gallows for them all at the worst. MacKenzie downplayed the more violent aspects of his revolution. Calling it more an armed demonstration, with the British Garrison gone, they just had to march on City Hall, seize the arms there for the militia and then take Fort York. Such an act, MacKenzie concluded would only force Parliament into giving in to their demands to establish the Republic he dreamed of. Some agreed with MacKenzie, others did not, without any consensus they sent MacKenzie out to gather support from the population throughout the rural areas surrounding the city, where much of their base support lived. Charles Duncombe would head west to the London District to gather his supporters together to launch their uprising and rejoin MacKenzie in Toronto. The group agreed to meet again to go over the plan and to see if they had enough support. MacKenzie along with Samuel Lount and Peter Matthews travelled through the small villages that harboured support for the cause. While MacKenzie spoke at length on the plan, it would be Lount and Matthews who convinced the public that they were only armed to show their resolve, there would be no violence. They were all told that the day of the demonstration would be the 7th of December and that they should gather at Montgomery’s Tavern. Montgomery’s provided a jumping off point, located outside the city limits on Yonge Street one of the main thoroughfares in and out of Toronto. But not all who attended MacKenzie’s rallies were supporters of the cause and word reached back to the Executive Council. Furious, Bond-Head issued a warrant for MacKenzie’s arrest. Since John Rolph had not yet been fingered as being a part of the rebellion, learned of the warrant immediately issued a counter order for the gathering to take place on the 4th of December. For many, the revolution had gained a life of its own, and there would be no stopping it now. MacKenzie unable to issue a second counter order, inflated the numbers he had and rode for Montgomery’s.

Mamiya m645 – Mamiya-Sekor C 35mm 1:3.5 N – Ilford FP4+ @ ASA-125 – Blazinal (1+25) 9:00 @ 20C
Many who marched to Montgomery’s did so unarmed and in small groups, to prevent suspicion. Plus MacKenzie had promised both food, arms, and ammunition up arrival. But even MacKenzie had promised more than he could deliver. While Montgomery supported the Reform cause, he had no love for the radial arm and was most surprised at the arrival of rebels at his doorstep. He had already rented out his tavern to customers, ironically Tory supporters. But had little choice when the rebels began to show up, even MacKenzie was surprised at the numbers. Some took to the local farms, stealing and killing the animals for food, and stealing what weapons and ammunition they could find. In Toronto, John Rolph continued to play his part as a loyal member of the Government. Marshall Spring Bidwell, who had nothing to do with MacKenzie’s rebellion began to plan his escape, due to his name being mentioned in several Rebel documents. FitzGibbon continued his crusade to get Bond-Head to call out the militia to prevent the revolt from happening. When faced with Bond-Head’s refusal, he quietly went around to the officers living in the city to be ready and pass the word around to their men. The situation at Montgomery’s was little short of chaos, the only man with military experience, Captain Anthony Anderson, worked on arranging for some semblance of order. Those who were armed were assigned to Samuel Lount and sent out as a rough picket around the Tavern, Anderson knowing that such a large group would not stay secret for long. A local blacksmith delivered a pile of rough pikes, which the rebels connected to staffs, others readied clubs. The rebels had only a few, maybe one hundred men who were armed with firearms, a rough collection of musket, rifles, and personal fowling pieces. The rebel gathering attracted the attention of Robert Moodie. Moodie, a retired Lieutenant-Colonel who commanded the 104th Regiment of Foot during the War and settled in the area in 1835 rode out to investigate the sounds, as he rode out closer. Encountering an armed picket, he made to escape; a sharp rifle shot ended his flight and his life. Word of Moodie’s death and the gathering of rebels at Montgomery’s Tavern spread like wildfire through Toronto. Bond-Head continued to downplay the threat, hoping for calm. Others continued to ready their militia equipment or irregular groups to stand in defense of the city. Alderman John Powell, wanting to get a better idea of the situation at Montgomery’s gathered his friend Archibald MacDonald and rode north. When they encountered a small force of Rebels, MacKenzie himself was among them, and Powell surrendered. Upon their return to the Tavern, many among the rebels wanted the two men searched for weapons. Powell insisted he was unarmed, and MacKenzie took the Alderman at his word, having served with him during his tenure on city council. As the rebels argued over what to do with the prisoners, Powell pulled out one of his hidden pistols, the first shot rang through the tavern, filling the room with smoke, Captain Anderson lay dead. In the chaos, Powell aimed his second at MacKenzie, but it misfired. The two men lept to safety and ran into the night, crossing Queen’s Park, Powell abandoned his horse to move on foot through the thick trees. As he arrived at the Governor’s mansion, he was surprised to find FitzGibbon already there trying to get some action from the sleeping Bond-Head. Together the two men again entered the governor’s bedroom, Powell recounted his harrowing escape. The tale rose Bond-Head to action, he ordered the militia called up from any district who could mobilize. FitzGibbon agreed, but also recommended that the rebels might be agreeable to surrender if the proper terms were forwarded. But who would Bond-Head send? He needed people whom he could trust, but would also appear friendly to the rebels. John Rolph quickly agreed, Marshall Spring Bidwell quickly turned down the governor and made his way out of the country. Robert Baldwin, despite his previous resignation from all forms of public life, was still held up as an example of a strong moral character by Bond-Head seemed hesitant. Bond-Head insinuated that Baldwin’s refusal could be grounds for him being lumped in with the rebels, Baldwin backed into a corner, agreed.

Mamiya m645 – Mamiya-Sekor C 45mm 1:2.8 N – Ilford FP4+ @ ASA-125 – Blazinal (1+25) 9:00 @ 20C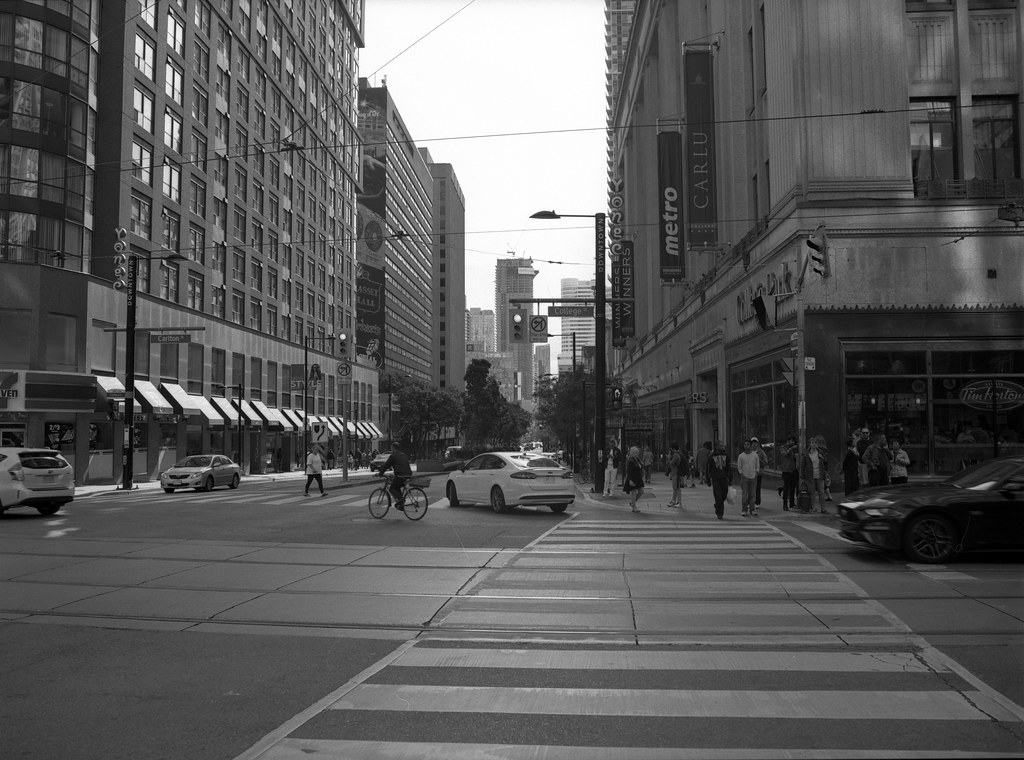
Mamiya m645 – Mamiya-Sekor C 45mm 1:2.8 N – Ilford FP4+ @ ASA-125 – Blazinal (1+25) 9:00 @ 20C
Both sides did not realise that their opposite now marched towards them. The rebels made their way south, nothing more than an armed mob of angry men lead by MacKenzie, Lount, and Matthews. While Baldwin, Rolph, FitzGibbon, and others rode north under a flag of truce. The two groups met at what was then known as Gallows Hill; today is where Mount Plesant Cemetery stands. The rebels, confused and scared at the site of one of their standing with the Tories. Baldwin was of no consequence, having separated himself from public office after the 1836 elections and left the Province. The government treaty party presented an offer of amnesty if the rebels laid down their arms and returned to their homes in peace, the offer did not extend to the leaders, especially MacKenzie who was the centre of the whole affair. In return, MacKenzie turned down the offer and demanded that the Upper Canada Parliament be dissolved, and Bond-Head turn over power to an interim council and hold a Constitutional Congress. As the government party turned and rode back south, Rolph hung behind. Here history is a little iffy on what happened; some say that Rolph spoke to Lount, others to MacKenzie. To whomever, he spoke he informed them that the city was undefended and that if they followed him, they would be able to take direct control of the city and force their demands. Rolph then rode hard to rejoin the government party but did not join them at the Governor’s mansion. Instead, he headed for Elliot’s Tavern located at Yonge and Lot (Queen) which was a known radical hangout; he informed them that the rebel army was on its way and they should stand ready to join them. Rolph then, fearing his involvement would be discovered made his escape to Buffalo. It took a bit of time for MacKenzie to get the mob moving, as they marched south they destroyed the tool booth at Bloor Street, at that time was the northern limit of Toronto. Lount and his riflemen moved ahead of the main body, as they reached College Street, a small group of men under Toronto’s Sheriff, Samuel Jarvis opened fire. Lount’s riflemen lined up as best they could and opened fire, but as the front rank dropped to reload, the second rank ran out of fear. The skirmish lasted only a moment, but it was enough to halt the rebel advance. As they returned to Montgomery’s, MacKenzie ordered two private homes of Tory allies destroyed, and if it had not been for the intervention of Lount, the wanton destruction might have continued. But the damage had been done, MacKenzie’s will was wavering.

Nikon F6 – AF-S Nikkor 14-24mm 1:2.8G – Kodak Tri-X 400 @ ASA-400 – Kodak D-76 (1+1) 9:45 @ 20C
Mamiya m645 – Mamiya-Sekor C 45mm 1:2.8 N – Ilford FP4+ @ ASA-125 – Blazinal (1+25) 9:00 @ 20C
Militia troops from all across the home district and beyond flooded into the city, Toronto took on the role of an armed camp; businesses were shuttered, private homes barricaded and boarded up. Among the troops to arrive was a small force from the Gore District, commanded by Allan Napier MacNab and William Chisholm. MacNab, a close friend of Bond-Head, was welcomed warmly and promptly offered full command of the small army gathering in the city. To FitzGibbon the appointment of a militia officer to such a high command was a slap in the face to FitzGibbon. While both men were members of the Family Compact, in his role as Adjunct General, although only acting the position should have gone to him. Although Bond-Head quickly reversed his choice, putting FitzGibbon in overall command, and MacNab the center body of the army. MacKenzie rebel force was in chaos, after the events of the previous night many had chosen to leave the movement to prevent their arrest and imprisonment, although many others joined the ranks to replace them. His continued to rant, taking only one action. He ordered a small raid against a mail coach as it rode out of the city, ambushing it on the Dundas Road at the Peacock Inn. The mail coach did little to tell the rebels of the government disposition. But for those not in the tavern life would be far more difficult as the militia and paramilitary groups were rounding up those connected to the radical reformers and parading them in chains. MacKenzie continued to delay. By the 7th of December, the arrival of Colonel Anthony Van Egmond marked the return of some form of military leadership. However, the former Cavalry Officer who had served in Napoleon’s Grande Armee. Colonel Van Egmond did not look kindly on the situation at the tavern and history states that harsh words were exchanged between him and MacKenzie. Van Egmond knew a desperate situation when he saw one, the tavern was far from defensible, pickets were loose, and the leadership is wanting. Van Egmond recommended withdrawal, and a regroup, MacKenzie wanted to hold to show resolve. While we don’t know it was said between the men, but Van Egmond decided to stay. He moved Lount’s riflemen forward to the fence and treelines and sent another group far forward to Gallow Hill as watchmen for the militia force they knew were coming. As a diversion, Peter Matthews led a raid against the Don River Bridge that carried King Street over the river. While the rebels saw initial success destroying a toll booth and setting fire to a tavern, the arrival of the militia chased the raiders off and many, including Matthews, was captured. The grand militia army formed up in front of the home of Bishop John Strachan, known to the residents as the Bishop’s Palace on Front Street, parading in front of Bond-Head, Strachan, MacNab, and FitzGibbon. And with bands playing and the muskets shining in the cold winter sun marched north on Yonge Street. The group was split into four divisions, the center division contained the largest body and marched straight up Yonge Street. The wings advanced through the farm fields to the east and Queen’s Park to the west. The fourth division under Colonel William Chisholm guarded the Dundas Road heading west to prevent the rebels from fleeing.

Mamiya m645 – Mamiya-Sekor C 1:2.8 f=80mm – Ilford HP5+ @ ASA-400 – Kodak HC-110 Dil. H 10:00 @ 20C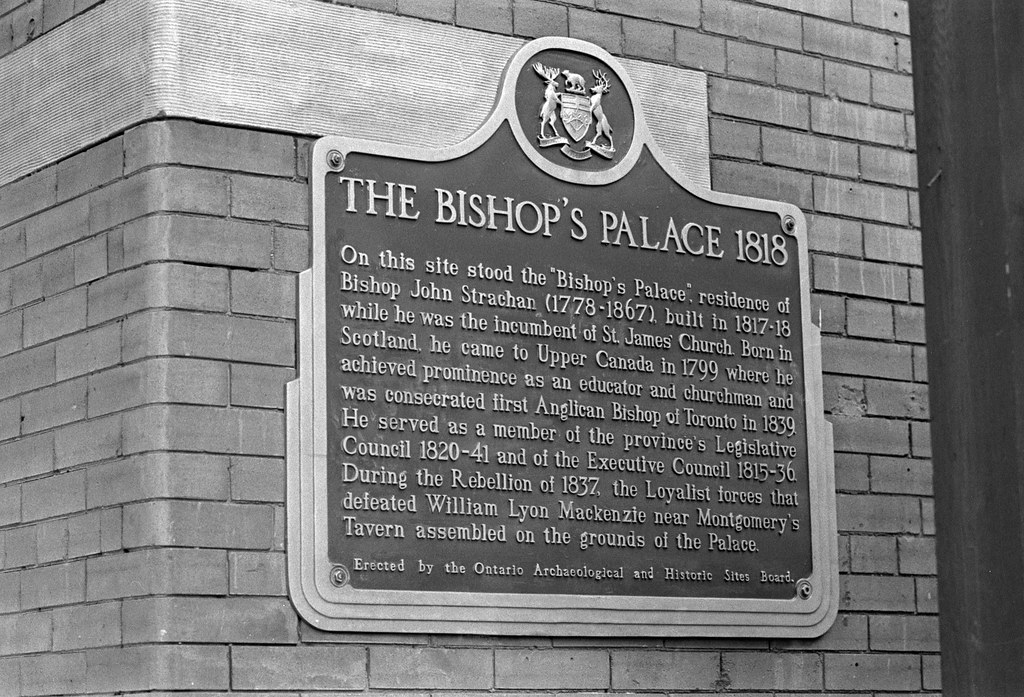
Nikon F6 – AF-S Nikkor 85mm 1:1.4G – Kodak Tri-X 400 @ ASA-400 – Kodak D-76 (1+1) 9:45 @ 20C
The rebel sentries at Gallow Hill melted back without any effort to resist the government force. And when MacKenzie learned that the militia was on the march, his fear got the better of him, and without pausing the take his belongings, he fled from the tavern leaving his supporters to stand their ground. The rebels had no chance, but encouraged by the remaining leaders stood their ground. The loyalist militia had gotten their hands on a pair of cannons which drew up ahead of the infantry and peppered the woods with both round and canister shot. But the one gun crew did not want to kill the rebels outright but only force a surrender by firing over their heads splintering the trees. The other crew fired directly into the rebel line. The air filled with dirt, shot, splinter and screams. As the rebels fell back, the artillery began to fire on Montgomery’s Tavern and the Paul Pry Inn where the rebels huddled under shelter. But those with firearms fought a pitched battle against the government militia. But the battle could not be won by the rebels, and as the infantry pushed in on all sides, the rebels were flanked and ran. Victorious, Bond-Head ordered MacNab to give chase while the tavern searched. A great deal of intelligence could be found among MacKenzie’s forgotten papers, lists of names and settlements where the rebel cause saw support. They also found a curious flag, twin silver stars on a blue field, with the word Liberty in red beneath the stars. They also found among the list of names, Charles Duncombe who was planning his uprising. Once the rebels were rounded up and arrested, Bond-Head ordered the tavern burned. FitzGibbon warned the governor against such an act, but Bond-Head feared the survival of the tavern would be a focal point for future rebels. With the Toronto uprising suppressed and the leaders on the run, now hunted by the militia and Tory irregulars, the government turned their eyes west. All but FitzGibbon, who tendered his resignation and retired to England due to his treatment by Bond-Head.

Mamiya m645 – Mamiya-Sekor C 45mm 1:2.8 N – Ilford HP5+ @ ASA-400 – Kodak HC-110 Dil. B 5:00 @ 20C
Mamiya m645 – Mamiya-Sekor C 45mm 1:2.8 N – Ilford HP5+ @ ASA-400 – Kodak HC-110 Dil. B 5:00 @ 20C
Mamiya m645 – Mamiya-Sekor C 45mm 1:2.8 N – Ilford HP5+ @ ASA-400 – Kodak HC-110 Dil. B 5:00 @ 20C
In the west, Doctor Charles Duncombe faced a problem; he had no communication direct or indirect with MacKenzie in Toronto. Since the beginning of December, the rebels in the west had moved out of the major settlements into the rural regions where they found a great deal of support. And many had already been arrested in a raid against one of their hangouts in London. But unknown to them, MacNab had returned to Hamilton and gathered a far larger force and was on the march towards Brantford. Duncombe, thinking no news was good news, gathered his small band of rebels in the village of Scotland to begin their march first on Brantford and then Hamilton. From there they would join MacKenzie in Toronto. But as Duncombe marched out of Scotland, they were met by a fellow supporter who bore dire news. The man had recently escaped from a government militia camp in Brantford and brought news of MacKenzie’s defeat and the warrants out for the arrest of any rebel leaders. He also spoke of the size of MacNab’s army, which Duncombe had no hope of countering. But unlike MacKenzie, Duncombe would not lose his cool, he ordered his men back to Scotland first, where he ordered them to disperse, go into hiding, give up the cause, or flee to the United States. A few volunteers offered to remain behind in Scotland to provide a rearguard action. On the 13th of December, Duncombe ordered his papers hidden, and he made his way in disguise to the United States. The few volunteers in Scotland were quickly overwhelmed and surrendered to MacNab’s Militia. To display the might of his authority, MacNab paraded the prisoners through Norwich and called out the local militia who turned out in larger numbers than the unprepared colonel could have imagined. He also had both MacKenzie’s and Duncombe’s Papers which made the job rounding up the rebels in the area far easier. Any who resisted would find themselves arrested. But MacNab did not stop there, anyone connected to rebels, family or friends, found themselves terrorized, and properties destroyed. MacNab did this more out of instilling fear among the local population which had shown they both supported the government but also the rebel cause. It would take long, either out of fear of further harm coming to their family or out of desperation from cold and hunger the last remaining rebels in hiding surrendered to MacNab on the 18th of December. Before sending them to local jails to await trial, MacNab issued a lecture on their actions against God and the Crown.

Mamiya m645 – Mamiya-Sekor C 150mm 1:3.5 N – Ilford FP4+ @ ASA-125 – Blazinal (1+25) 9:00 @ 20C
Nikon F90 – AF Nikkor 28-105mm 1:3.5-4.5D – Kodak TMax 100 @ ASA-100 – Kodak HC-110 Dil. B 6:00 @ 20C
The uprisings of 1837 should not be compared to the Lower Canada Rebellions of the same years. In Upper Canada, the rebellions focused solely around William Lyon MacKenzie who had no idea how to conduct any military action. He forced the issue by incorrectly representing the actual situation and resulted in a strange aberration in Canadian History. Due to the failure, the Toronto uprising is often passed off as a farmer’s revolt, and the London Rebellion is nearly forgotten. Oddly enough Duncombe’s Uprising has a plaque marking the event in the village of Scotland, Ontario. In Toronto, no such plaque exists, either near where Montgomery’s Tavern once stood or between College and McGill along the Yonge Street corridor. The site of the tavern would house Toronto Postal Station K and today is the site of a new condo development, which returns to the historical name, Montgomery Square. A memorial to the rebellion is present but located in the Toronto Necropolis on the western side of the Cemetary lone broken column with a small plaque that transcribes the faded carved letters. You can still visit Charles Duncombe’s house which is now the Elgin Military Museum in St. Thomas Ontario. The Elliot Tavern stands where 2 Queen West Stands today. Doel’s brewery burned down in 1847, although after the November meeting Doel had no further involvement in the rebellion. His house would survive at Bay and Adelaide and would become run down and was a commercial property when it was demolished in 1925, today the Northern Ontario Building stands where the house and brewery once stood. Strachan’s Bishop Palace was demolished in 1890 to make room for the building that still stands there today and has a Jack Astor’s on the ground floor, although a historical plaque is affixed to the building. But what many don’t realise is that after the twin rebellions of 1837 the rebellion continued, the rebel leaders would flee to Buffalo, New York and begin to gather support from both Canadians and Americans to continue to fight for a Republic.