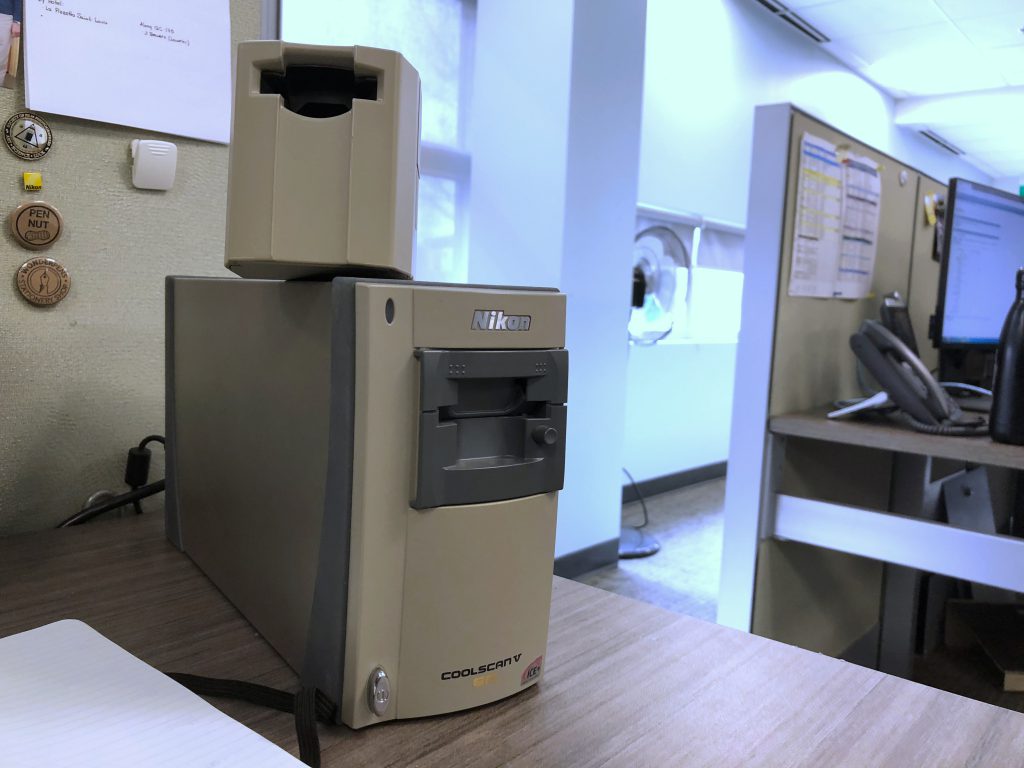
Ever since I started doing the scanning of my film my workflow has remained static, an Epson flatbed film scanner, the V500 first and the V700 currently. It worked, I got decent quality enough to get lab prints of my film scans up to 11×14 and be able to share around Flickr, 500px, Facebook, and Instagram. Now a dedicated film scanner is a different animal from a flatbed like the Epson. Names like Imacon, Plustek and Nikon I knew about, but they always were outside of my price tag. And as a photographer who shoots multiple formats and doesn’t have a lot of desk space, I had to compromise. Well at least until the Coolscan V came across my desk at work.
Technical Specs
Make: Nikon
Model: Coolscan V ED
Format: 135, APS, Glass Slide
Light Source: Red, Green, Blue, and Infrared (RGBIr) LEDs
Sensor: Linear CCD image sensor with 3964 pixels with an output resolution of Up to 4000PPI.
Interface: USB 2.0


Make no mistakes; the Coolscan V ED is not new technology; in fact, it’s quite old. Much of the software is designed for use with older versions of windows, so the first hurdle was to get it recognised as a scanner by Windows 10. Now Windows 10 does pick up the device, but it doesn’t work or is picked up as a scanner by Photoshop. Now there are two options these days the first is to use the universal scanning software called VueScan, the second is to modify the driver a bit and use the Nikon Scan software. Because the scanner came to me in a junk pickup, I decided not to use the VueScan option because the trial version left a watermark and I didn’t want to pay for software that wasn’t going to be used. After digging through tonnes of forums all of which pointed me towards VueScan, I found a link to Axel’s blog, which contained the modified driver and a link to the Nikon Scan Software, both of which are free. Thankfully this process stayed painless, and the scanner was recognised, the software installed and I was ready to begin scanning my 35mm stuff on a dedicated scanner.


The scanner itself is very compact and takes up little space on my desk, probably a quarter of the size of my V700, so keeping it at work makes senses as I would need to reorganise my desk in my home office. But the scanner itself is a little tricky to operate. First off it does only take 135 or APS film. It can also read prepared glass slides. Now for each, you need an adapter to mount inside the scanner body itself. For 35mm work, you need either the MA-21 or SA-21. The MA-21 is for mounted slides; the SA-21 takes strips of film with 2-6 exposures on each. For APS you need the IA-20 adapter and glass slides in the FH-G1 adapter. If you are looking into purchasing one make sure you get at least the SA-21 adapter, or if you have the MA-21 there is FH-3 adapter included. Without these, the scanner is worthless to you, and the scanner and accessories are not cheap on the used market. Thankfully it takes a standard power cable and USB-A to USB-B cable both of which are plentiful these days.

The actual operation of the scanner if you’re used to the ease and speed of the Epson Scanner Software, Nikon Scan is slow and clunky. And the scanner itself is fairly picky on how it takes and scans film. Unlike your average flatbed, the Coolscan V is an autofocus scanner, and if you have thin negatives or a foggy base, the scanner will have a hard time picking anything up. It will also mess up the frame spacing. So on your T-Grain film, it might be worthwhile giving them that extra minute in a fix to clear off that base. Also, you’ll want to make sure the negatives are cleaned at either end with no exposed sprockets and a clean straight cut. And watch out for cupping too much, and even the SA-21 will have trouble with loading and focusing. And finally, be patient and no violence. If the film doesn’t load right the first time, turn it around, and try again, after the green status light stops blinking quickly.

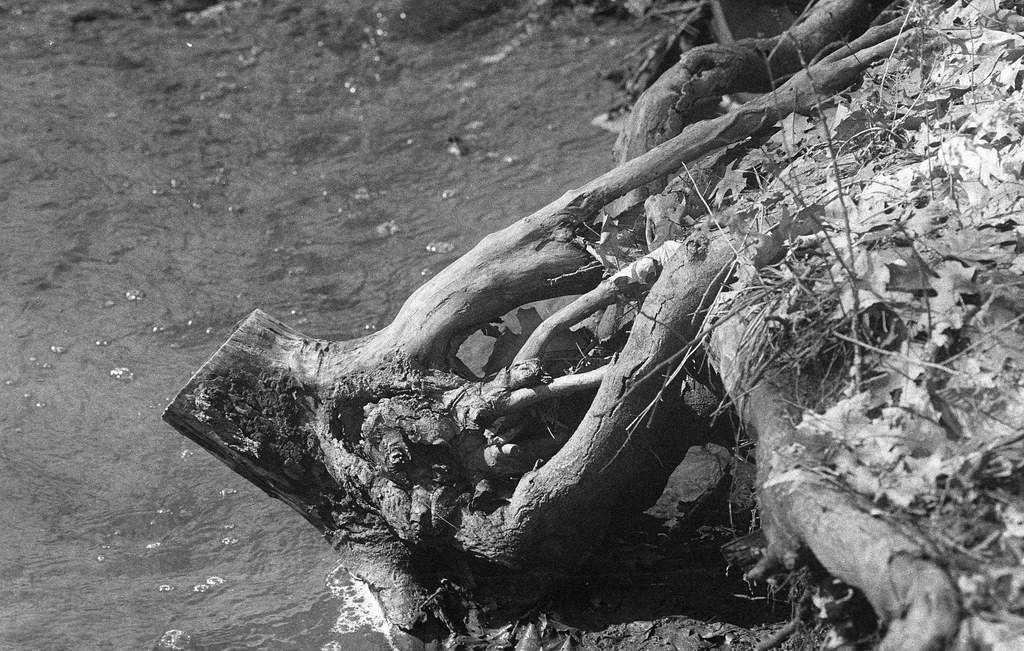
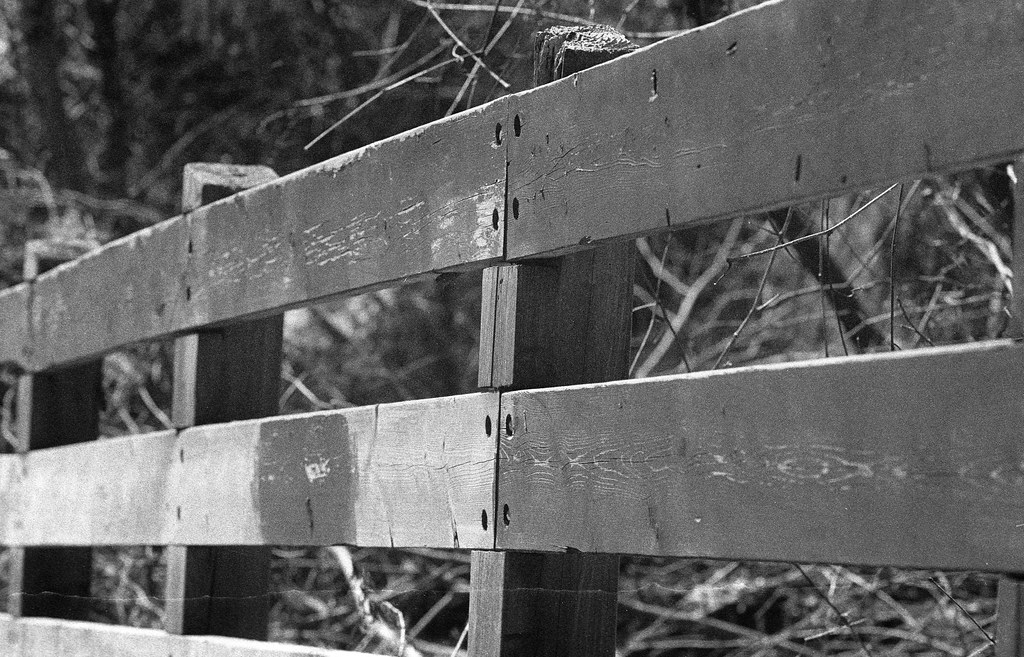
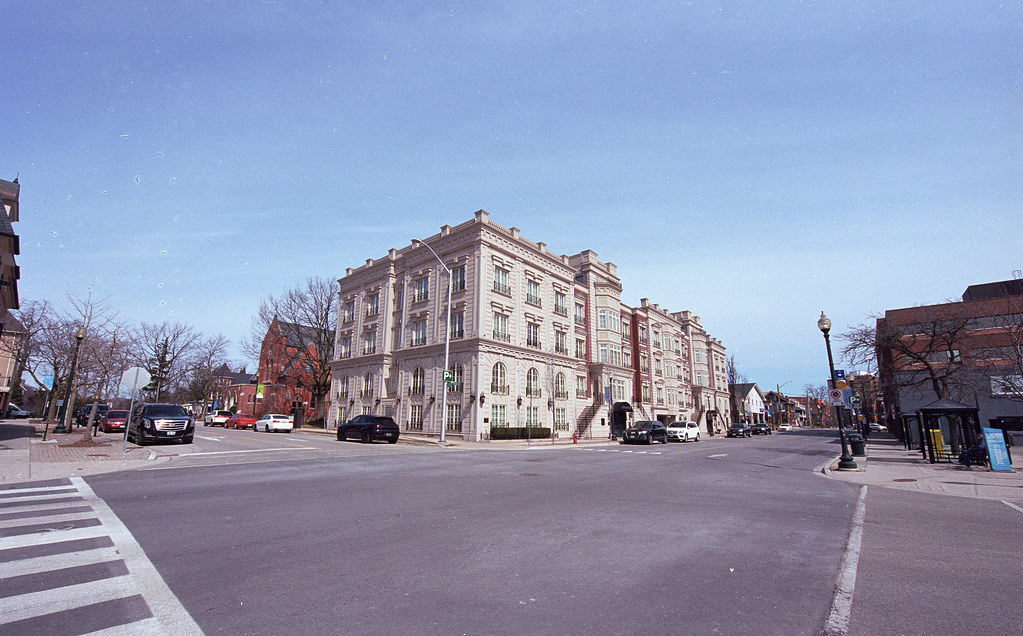
And if you think loading the scanner is an exercise in patience, wait until you get to the software! When you first load in your strip, the scanner will generate previews of each frame and load it into the toolbox, you then can go through each frame, select it then select what you want to scan and scan it. Then I save it as a TIFF file, however, file name and sequence I run as a manual process only which again adds to the slowness of the process. Now I haven’t yet figured out how to stop the software from applying all the edits to each scan, but I have to dig a bit more through the manual I think. Overall it takes now an hour to get through a 36 exposure roll, but the image quality is worth it. What I like the most about the scanning software is that it has dedicated modes for B&W Negative, Colour Negative, Colour Positive, and Kodachrome. Yes, to show the age the scanning software has a Kodachrome Mode. And each outputs amazing scans that I find are better quality than I got from my 35mm scans from the V700.


In closing, I’m glad I got the Coolscan V it certainly has become an integral part of my workflow in digitising my 35mm work, and while it has increased the amount of time I spend, I think it helps me better edit down the number of shots I post online and run through post-processing. I also find I get more keepers because of the bigger preview image. I’m lucky in the sense I didn’t have to pay for the scanner and that it worked right off the bat. These units still carry a hefty price tag on the used market, and if you have one and don’t use it I recommend investing in the Vuescan Software or taking the backdoor route as I did, you won’t regret the quality and improvement in your scans as a result.
Great read – as are all of your articles. Lucky guy! Clearly you do a lot of scanning. Do you have any tips (maybe another blog post topic :-)) regarding films and or development processes/contrast/developers etc. that scan more easily and need less post processing than others – whether on your Epson or the Nikon.
I too have an Epson flatbed so the filmholders do a reasonable job for curl etc. however I also have an ancient HP S20 Photosmart for which film feed is the pain in the …. it was made in the days of WinXP and also needs some coaxing to run under Win10. Happy snapping!
Thank you! As for the topic, I think that’s a great idea. The one recommendation I do have right away is adjust your development times, do 30 second increments either up or down until you get the results that work best for your scanner and scanning software. The one thing that has helped me is going to Silverfast 9 SE for running my scans than the stock Epson software.